- Blog
- How to create Your First Form With nopCommerce CMS Form Builder
How to create Your First Form With nopCommerce CMS Form Builder
- 5:02:45 AM
- Friday, September 25, 2020
Create new forms and add them to your nopCommerce site.
Creating the view model
First, we're going to create the model for the request form by adding a new class to the /Models folder of your plugin. Let's call it RequestModel.cs
[SystemName("Request")] //EntityType.Name
[Parent("Content Management/Request")] //Parent folder for each template
[Icon("fa-envelope")] //Icon for menu
public class RequestModel : DPModel
{
    [Required]
    public string Phone { get; set; }
    [Required]
    public string Email { get; set; }
    public string Message { get; set; }
}
Creating/updating EntityType
- Build your plugin and upload to the website
- Restart your nopCommerce
- Go to the nopCommerce administration menu >> DevCommerce >> CMS >> Core Settings you will see the Core settings like in the following image:
- Click "Update" button to initialize Request entity type
Managing Forms
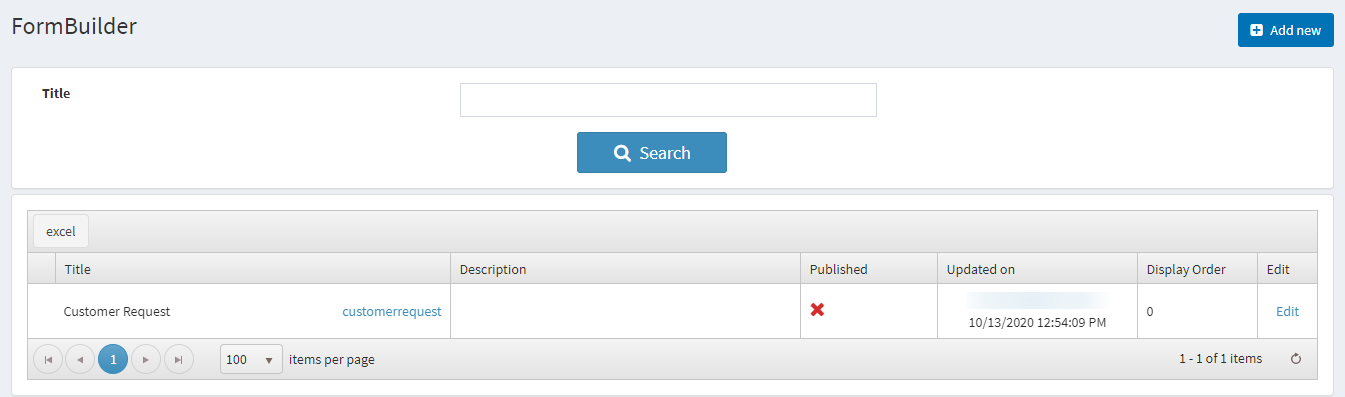
After going to the nopCommerce administration menu >> DevCommerce >> Module >> Form Builder you will see the list of forms like in the following image: 
Create a new form, you will need and choose EntityType(Request in our case) that will represent form fields in SearchEntityType field.
Also specify the following atts:
EditPageTemplate - choose form builder template
Layout - choose page layout. We use TwoColomns Layout by default
SuccessMessage -
ListPageUrl - you will need to specify this att only in case if you would like to show a list of Request to customer
FinalButtonTitle -
ShowCaptcha -
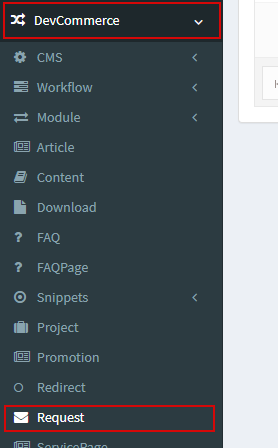
How to View the Form Entries?
One of the best features that DevPartner Form Builder offers is the dedicated admin menu for form entries. To access it, you will need:
- specify AdminMenu att in your model. For example: [AdminMenu("DevCommerce/Request")]
- specify [ShowOnListPage] att for fields that you would like to see on your list in admin area
- update your entity type.
Let's modify our RequestModel.cs
[SystemName("Request")] //EntityType.Name
[Parent("Content Management/Request")] //Parent folder for each template
[Icon("fa-envelope")] //Icon for menu
[AdminMenu("DevCommerce/Request")]
public class RequestModel : DPModel
{
    [Required]
    [ShowOnListPage]
    public string Phone { get; set; }
    [Required]
    [ShowOnListPage]
    public string Email { get; set; }
    public string Message { get; set; }
}
After updating
Here, you can see all the form entries to your form.