- Blog
- Sync Dynamics CRM Tutorial for nopCommerce
Sync Dynamics CRM Tutorial for nopCommerce
- 8:46:41 AM
- Wednesday, July 15, 2020
App registration
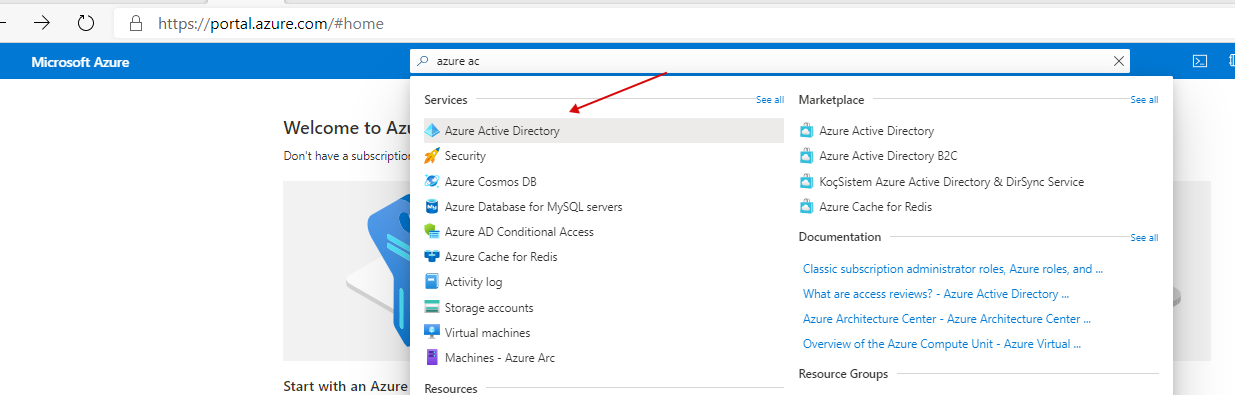
- Log into portal.azure.com using your Office 365 administrator user of your Dynamics CRM subscription.
- Find Azure Active Director
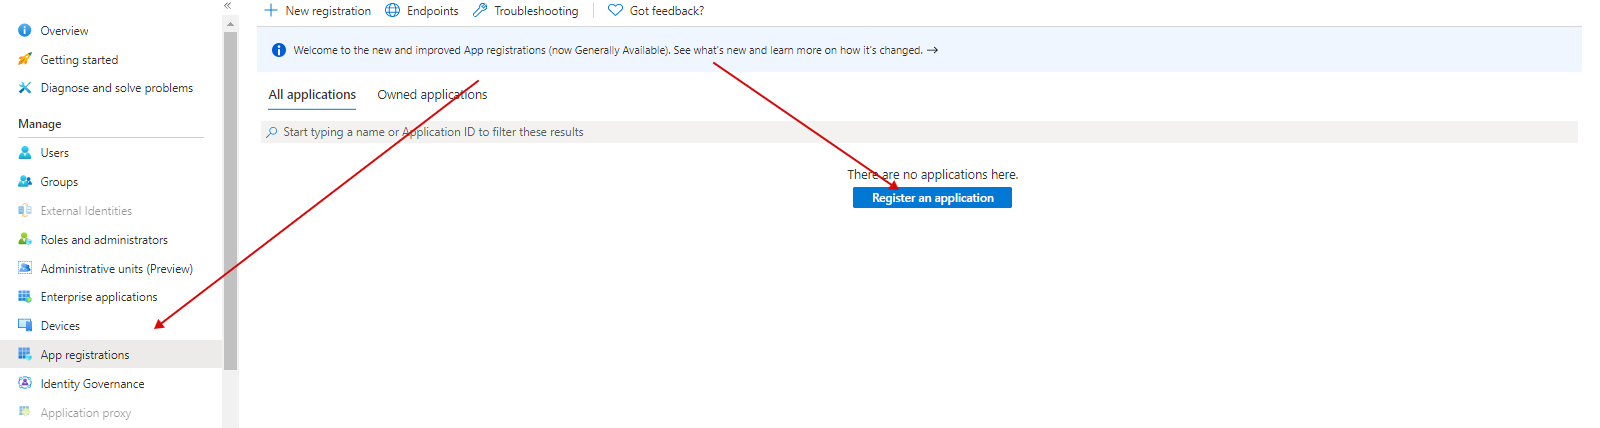
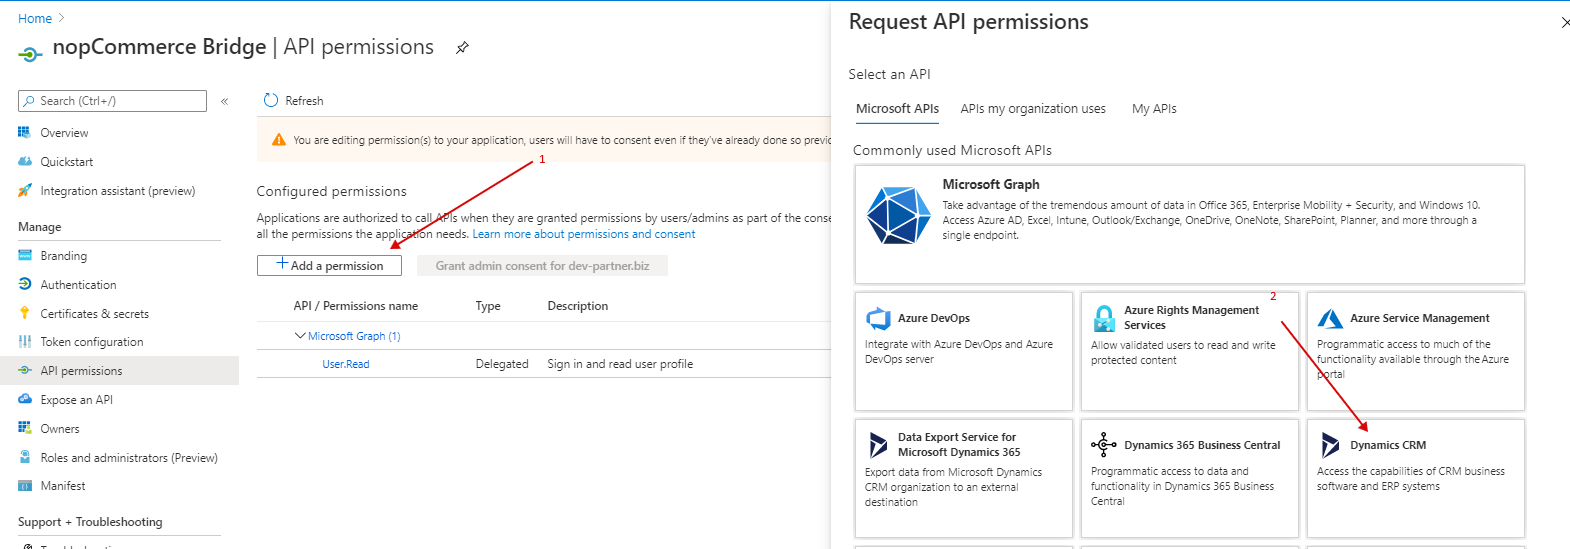
- Open App registrations and add New application registrations
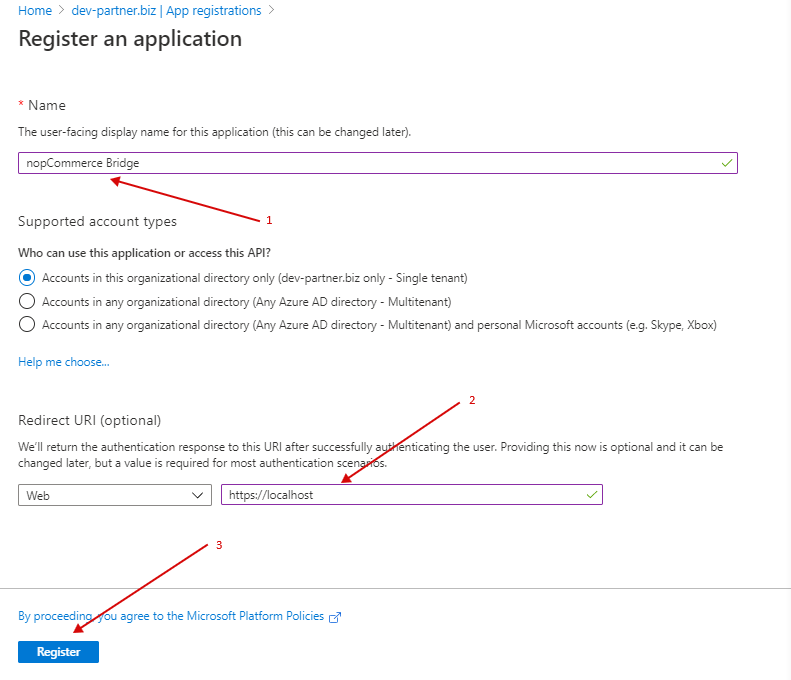
- Enter "Name" and "Sign-on URL", the URL could be anything (https://localhost for example)
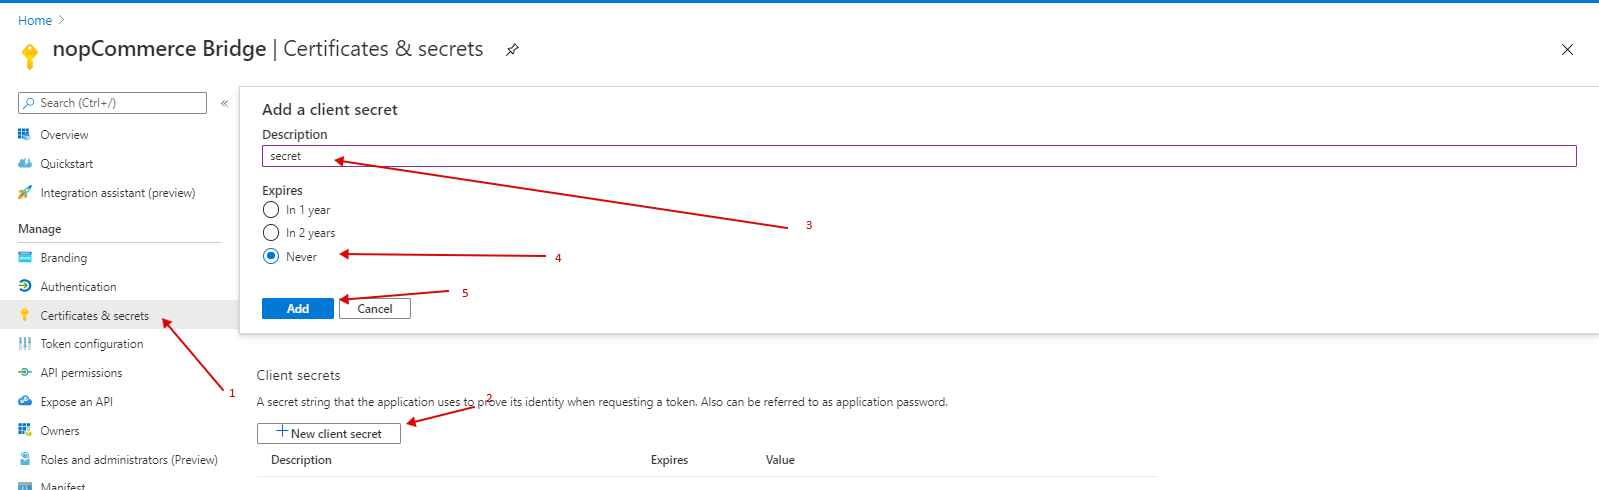
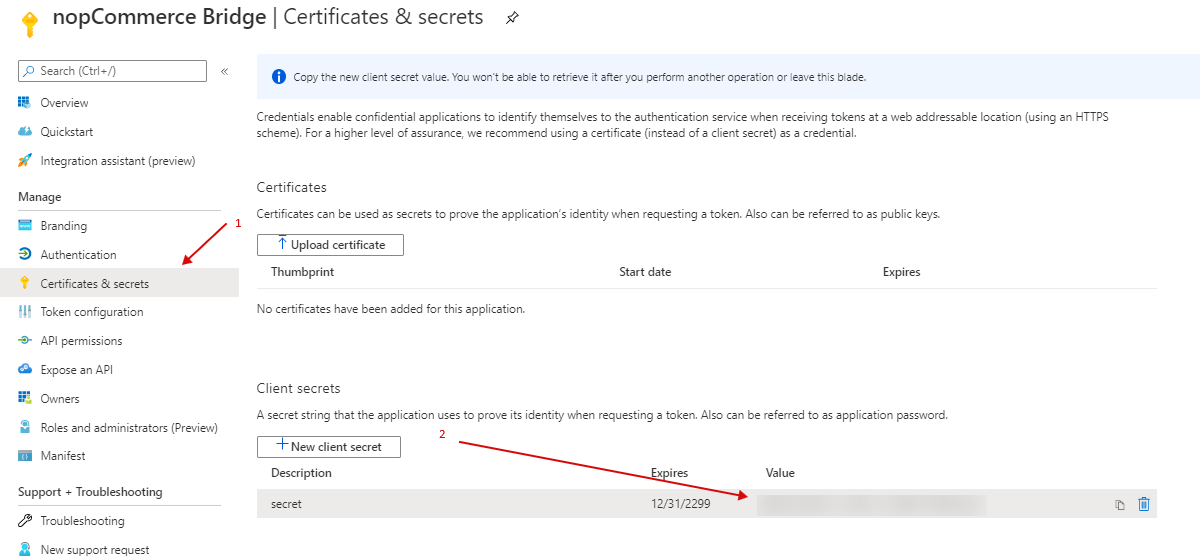
- Select the app you just created, go to Certificates & secrets. Click New client secret, Enter a key description then tick Expires - never and click Add button
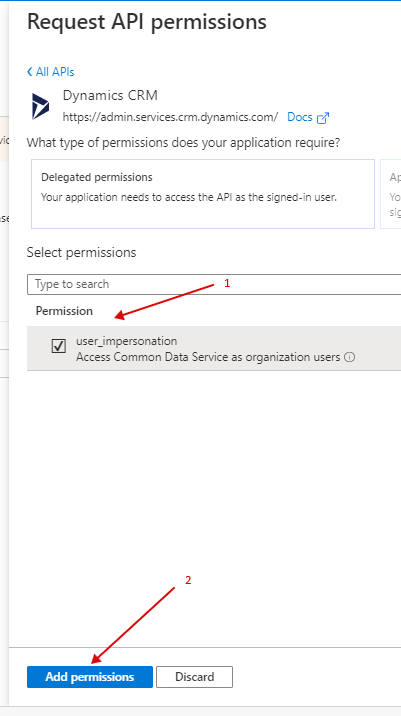
- Go to "Required Permissions", click Add, select "Dynamics CRM" then tick "Access Common Data Service as organization users".
- Copy the following fields from the App Registration Overview page: Application (client) ID Directory (tenant) ID

- Copy the Client Secret
Add CRM application user
- To let CRM know about the "client application" or "user", you'll need to add an application user.
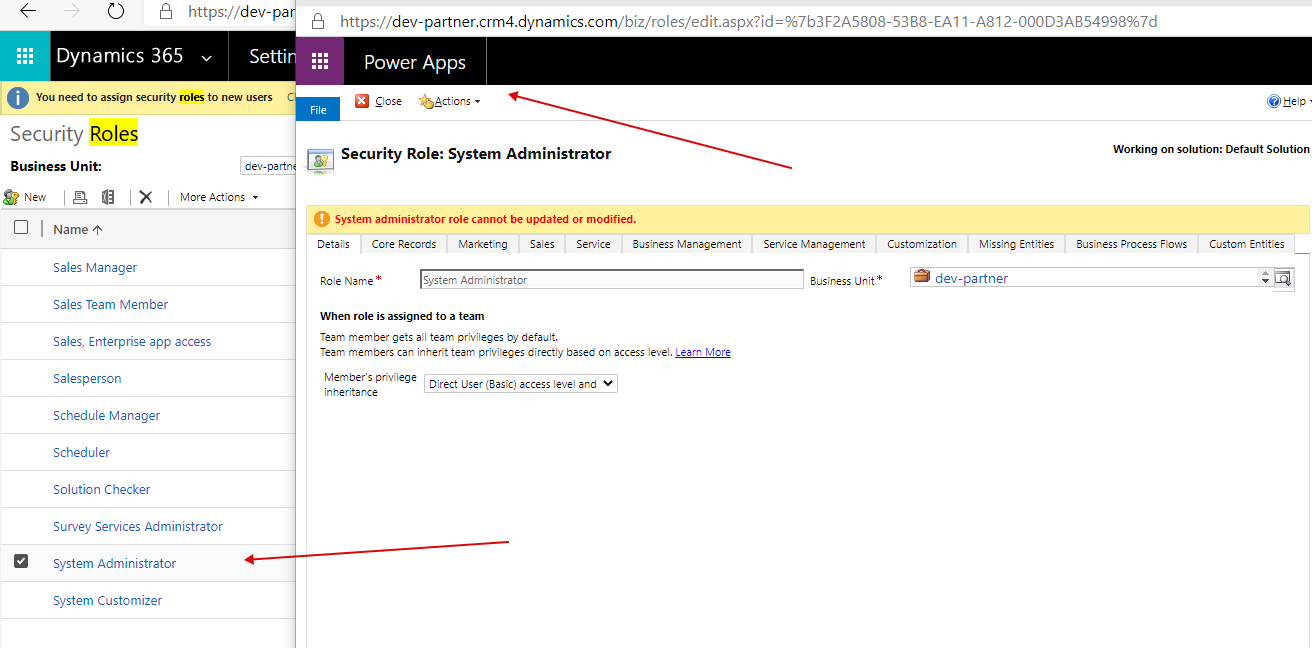
- Go to CRM\Security Roles, create a new Security Role or just copy the "System Administrator" Role
- Go to CRM\Settings\Security\Users, create a new User, change the form to "Application User"
- Enter the required fields with the Application ID that you have in the previous step. Once saved, CRM will autopopulate the Azure AD Object ID and the URI.
- Add the user to the Security Role created from the previous step.
Creating Application User in Dynamics CRM portal
Go to Dynamics Settings -> Security -> Users

Click on Add New User
Select **Application Users **view
2017 05 26 12 05 23 Users Enabled Users Microsoft Dynamics 365
Click on Add New User and select Application User from dropdown (*IMPORTANT).
2017 05 26 12 06 17 Users Application Users Microsoft Dynamics 365 1
2017 05 26 12 06 36 User New User
Enter Azure AD ID (we copied in earlier steps, Full name, and email address of the account.
2017 05 26 12 07 29 User New User