Search Tutorial 2 - Installing Solr for use with nopCommerce Search plugin
- Home /
- Tutorials /
- Search tutorials /
- Search Tutorial 2 - Installing Solr for use with nopCommerce Search plugin
The purpose of this document is to illustrate the steps needed to get SOLR configured properly for use with a nopCommerce instance with DevPartner Search extension.
Step 1: Install SOLR via Bitnami as described here.
Step 2: To save time, create a custom SOLR configset by copying, pasting and renaming the basic_configs folder (found, for instance, in C:\Bitnami\solr-x.x.x-x\apache-solr\server\solr\configsets) to create a new one named devcommerce_configs like this: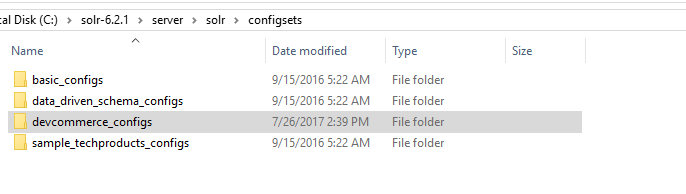
Step 3: Copy default files from \Plugins\DevPartner.Misc.Search\SolrConf folder and past them(with replace action) in the devcommerce_configs (C:\Bitnami\solr-x.x.x-x\apache-solr\server\solr\configsets\DevCommerce_configs).
Step 4: Copy the devcommerce_configs (C:\Bitnami\solr-x.x.x-x\apache-solr\server\solr\configsets\devcommerce_configs) folder and paste it in C:\Bitnami\solr-x.x.x-x\apache-solr\server\solr. Rename it to the index you are setting up, which, for this tutorial, use devcommerce_index.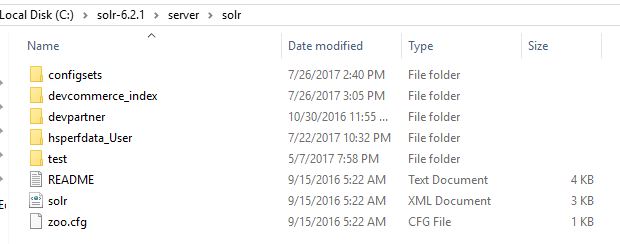
Navigate to the SOLR admin page :
Step 6: Go to Core admin, press Add core and fill name and instance dir with the name of the index being added (from Step 4 above), in this example use devcommerce_index.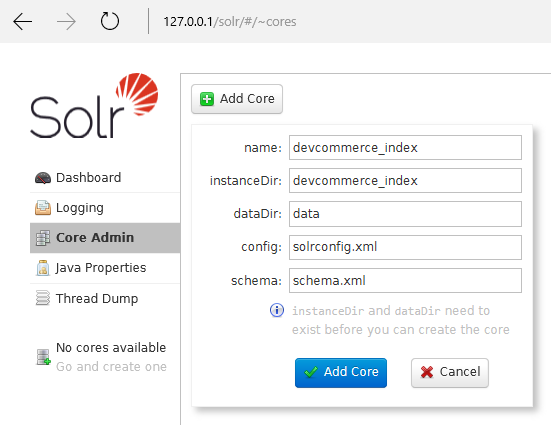
Verify it works
To check if anything is getting into your index.
1. install DevPartner.Search plugin
2. specify solr settings and click save button.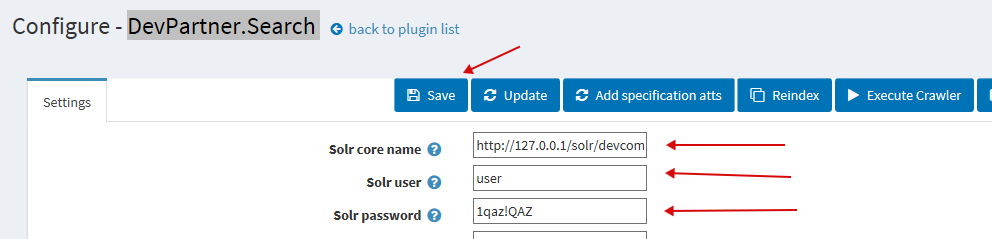
3. rebuild index by clicking Reindex button.
4. run schedule task to add documents to index by clicking Execute Crawler button.
5. request url - http://127.0.0.1/solr/devcommerce_index/select?q=*&rows=1000